Search This Blog

Thursday 27 October 2011

Modifying a Canadian Blonde

As I have posted before, I'm a big fan of Coopers Canadian Blonde, and I slightly prefer it to the Coopers APA, which is often the kit of choice for UK 'kit modders', which will become apparent if you browse through the Kit Brewing forum on Jim's Beer Kit. So for my first 'modified kit' experiment (these posts are out of chrolilogical order, I actually did this one before the 'Stout Old Gentleman outlined below), I thought I would keep it simple and 'Saaz up' a Canadian Blonde. What inspired me was a bottle of 'Saltaire Blonde' that I got on special offer, which is described as;

A straw coloured light ale with soft malt flavours, delicately hopped with Czech and German hop varieties.


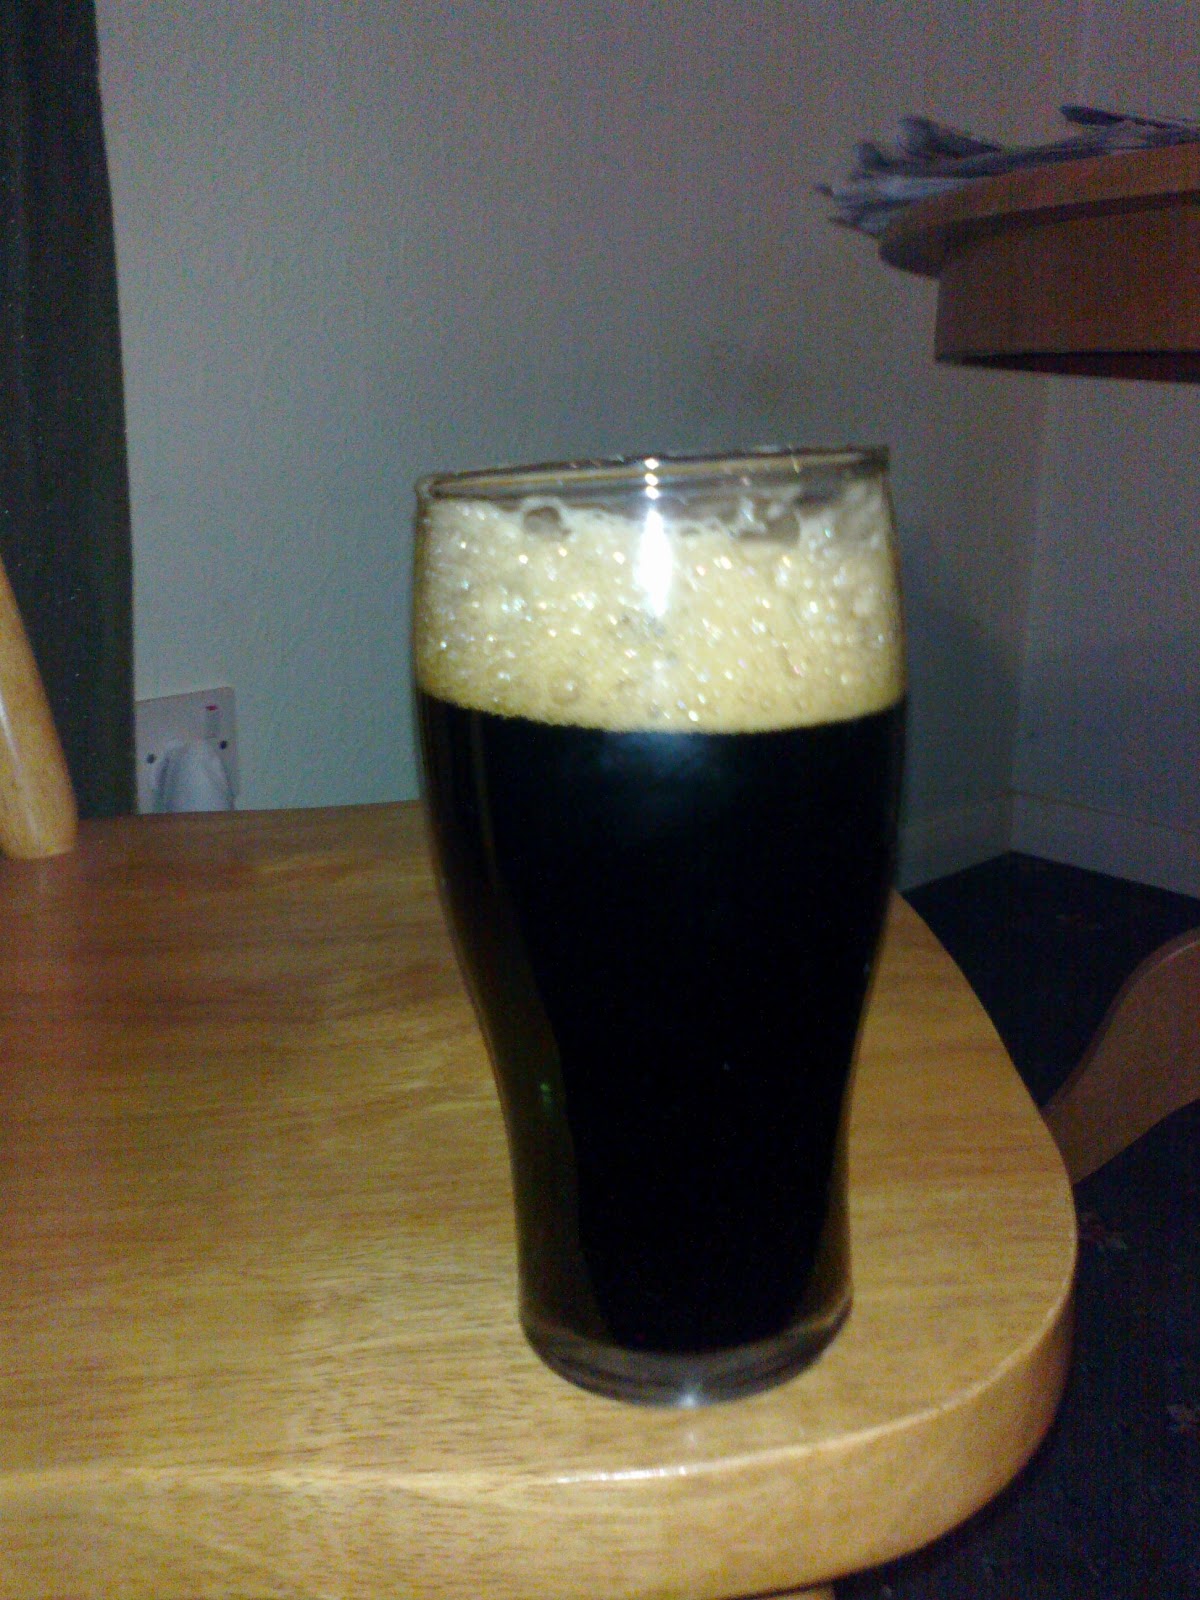
So, I thought Saaz would be a good place to start.  Just for the record, the piccy in the right is my crap photography, not official Saltaire promo material! While on the subject of pictures, I'm afraid I didn't take any of this brew, but if you look at the 'Stout Old gentleman' post, you will get the general idea.

Type: Modified Kit Brew
Sugars: 1 Coopers Canadian Blonde, 1Kg Muntons Brew Enhancer, 500g Muntons Extra Light Dried Malt Extract
Yeast: Danstar Nottingham Yeast
Hops: About 75g Saaz, boiled in 5L water + 500g of malt extract, 50% @ 15mins, 50% @ 5 mins
Additions: Water de-chlorinated with 1/2 Campden tablet.
Time in Primary: 3 weeks
Secondary method: King Keg
Time in Secondary: 4 - 5 weeks
O.G. 1050
F.G. 1014

The method for using the hops was as follows. The 500g of Extra Light DME was mixed into about 5 litres of water in a stock pot, which was brought to the boil. Once boiling, half of the hops were added in a muslin bag. After 10 mins, the other half were added and it was left to continue to boil for 5 more mins. Then, it was taken off the heat and the hop bags removed. This was then added to the FV containing the brew enhancer, the kit malt extract, and also used to swill out the kit tin. Once it had cooled sufficiently, the packet of Danstar Nottingham Yeast was thrashed into the wort, and then the FV was placed in my usual builders bucker water bath set to 21 degrees C.

The idea of using the Nottingham yeast was that it was meant to give a clean taste to brews, with little esters, and that is what I thought would suit this style of ale best, what with it using extra lager hops. The first thing I noticed, after fermenting had begun, was the usual 'slight pong' given off by some brews was pretty intense, and had my spare room smelling a bit like a drain for a couple of days! I don't know if this was the hops or the yeast or what, but it was interesting to note.

I left it in the FV under an airlock for 3 weeks to allow the yeast plenty of time to clear up after itself, and it was then king kegged with the usual 80g of priming sugar. It took much longer to come good, after 2 weeks although fully carbonated, it was more cloudy than Gordon Brown's mood on election night, and wasn't fully clear and suitable drinkable until after 4, more like 5, weeks. Oh, and it was really, really hoppy!

After  7 or 8 weeks it was improving, or perhaps my pallet was getting used to the Saaz hops, when a friend came to stay to go fishing. After a long fishing session, ending at the local watering hole, we returned to my house with the customary Chinese takeaway. He asked to try this creation, and was suitably impressed. I showed him how to keep the keg gassed up as he took beer out, and left him to it, with a 'help yourself, there's over thirty pints left'.

The next day, while cooking Sunday lunch for us both, he turned to me and said, 'What am I doing wrong, it's stopped coming out'.

'Erm, that's because the barrels empty, mate'

I will take that as a success, although I didn't get anywhere near the Saltaire Blonde taste. A good first attempt then.

Sunday 23 October 2011

Stout Old Gentleman

As it was my Dad who got me back into brewing about a year or so ago, I thought I would brew him a batch for his birthday. He likes dark beers, stouts, porters, etc, so with the success of 'Ditches' Coppers, and with a little searching around the Coopers 'How to Brew' website, and reading of Jim's Beer Kit forum, I came up with the following;

Type: Modified Kit Brew
Sugars: 1 Coopers Original Series Stout, 1 Coopers Original Series Dark Ale, 500g Medium Dry Malt Extract, 206g Chocolate Malt, steeped from 0 deg to 70 deg in dry malt plus 5l water, 500g Unrefined Demorera Sugar.
Yeast: Kit Yeast x 2
Additions:Water de-chlorinated with 1/2 Campden tablet.
Time in Primary: 3 weeks
Secondary method: Bottle
Time in Secondary: 3 weeks
O.G. 1064
F.G. 1014


Right, so here is the procedure I used.

1. The ingredients.


The idea was based on the 'tucan' stout on the Coopers website ( one can of Original Stout, plus one can of Original Dark Ale), modified to allow the use of chocolate malt steeped in some dissolved DME, and with some simple sugars, 500g of natural unrefined brown sugar in this case, to add some alcohol 'oopmph' and to give the yeasts something to get their teeth into to ensure a thorough fermentation.

2. The Sanitization.

This is my usual method. All the 'stuff' I need is  placed in a plastic container filled with thin bleach solution. The FV is filled to the top with the same, as is the wide necked FV, which, once rinsed, is filled again with water treated with 1 teaspoon of Campden powder to dechlorinate it.


.
3. Dissolving the Medium Dry Malt Extract.


About 5 - 6 litres of water is put into this stock pot, and once blood warm, the DME is thrashed in.I fond it mixes in really well as the water heats up without excessive clumping.

4. Weighing out the Chocolate Malt.

I was aiming for 200g of malt, but the odd gram here and there in a 23l brew length won't hurt!


5. Starting the steep.

The choc malt is then placed in a muslin bag, which is lowered into the heating dissolved malt and the end tied to the stock pot handle.


Using a thermometer, I keep an eye on this, and leave it in until the dissolved malt mixture hits around 75 degrees C. It then looks like below, having taken on the chocolate malts colour, and (hopefully) its lovely taste.


6. Removing the bag

I then remove the bag (you can see how dark the liquor has become from the little drips in the container below. The malt was then given to a friends pigs (who gobbled it all up).


Meanwhile, the stock pot is left to come to the boil for half an hour or so to kill off any nasties that would taint the beer.


7. Heating the cans.

Meanwhile, the two kit cans have their labels removed and are placed in a sink of really hot water so that the malt extract pours out easily.


8. Adding the sugar.

At this point, after the boil, I stir in the sugar into the stock pot, which as it's a hot liquid, dissolves easily.


9. Pouring the kit cans into the FV,.


10. Washing out he cans.

Once they have been poured into the FV, the cans were then washed out with the boiled wort, and added to the FV from a decent height, and it all thrashed around.


Once cooled to about 25 degrees C, the two kit yeast sachets are pitched, the FV placed in a builders bucket, with water poured in to bring it up to the top level of the FV. A 25W immersion fish tank heater is added, and set to keep it at a steady 20 degrees C. I didn't put the usual airlock in the bung, as I knew the dark coopers kits like to go mental, so I used a sanitized old syphon tube as a blow off tube, running down to the liquid in the builders bucket as a sort of improvised air lock. Thank god for that, as it went well and truly mental;


11. Batch priming and bottling.

Not many photos here, I'm afraid, but the FV was left for 3 weeks, and the gravity had dropped from 1064 to 1014, steady over 3 days. It was bulked primed with 60g of sugar, and bottled. 3 weeks in the warm, then 2 and a half months in the cold, resulted in the following;


The result was amazing. Really chocolate, coffee notes, and real body. I can't really explain how fantastic this was. Anyway, the proof of the pudding is in the eating, so after applying some labels designed by a family fried who is an artist, we had the following ready for Dad's birthday dinner party;


Did they go down well? Oh yes........

Monday 8 August 2011

Coopers Dark Ale

Type: Kit Brew
Sugars: 1 Kg Medium dry malt extract (Muntons), 250g Unrefined Brown Sugar.
Yeast: Kit Yeast
Additions:Water de-chlorinated with 1/2 Campden tablet.
Time in Primary: 2 weeks
Secondary method: Keg
Time in Secondary: 2 weeks plus (nearly 3)
O.G. 1044
F.G. 1012

I thought I would give this one a whirl, as I was interested as to exactly what a 'dark ale' was. I used the same additions as with the 'Ditch's' stout below, as there was a fair amount of opinion on Jim's Beer Kit forum that this was the way to go.

After the usual 2 weeks in the FV, it went into a King Keg. I was originally going to bottle this one, but ran out of time on bottling day, so into a King Keg it went.


It took nearly 3 weeks to become drinkable, more really, as it improved with age. Perhaps I should have bottled it after all. Did I like it? Well, yes and no. I was hoping for more caramel / choc malt notes, as with some German Dunkel or dark lagers, but it was a bit bland for my tatse. It was better towards the end of the barrel, and I may try this again with a lager yeast and some additions to try and get to a Dunkel type of outcome, but that will have to wait until the cold weather arrives later this year. I suppose the biggest problem was that I had never drank a bottle of Coopers Dark Ale produced by their brewery, so I had no datum point.

Verdict? Interesting, but a little disappointing. Yikes, I've actually found a Coopers kit that I can give a less than 10 out of 10 review to!

Saturday 9 July 2011

Coopers Original Series Stout ~ 'Ditch's recipe'

Type: Kit Brew
Sugars: 1 Kg Medium dry malt extract (Muntons), 250g Unrefined Brown Sugar.
Yeast: Kit Yeast
Additions:Water de-chlorinated with 1/2 Campden tablet.
Time in Primary: 2 weeks
Secondary method: Keg
Time in Secondary: 2 weeks
O.G. 1056
F.G. 1012


On the Jim's Beer Kit Forum, in the kit brewing section, there is a 'sticky' that has numerous replies and recommendations, for 'Ditch's recipe stout'. Basically, it's a Coopers Original Series Stout made up with 1Kg of medium dry malt extract, and about 250g of unrefined brown sugar. Such were the reviews, that I thought I would give it a try.

A miscalculation on my part saw it being brewed to 20L rather than 23, so it came out with a higher gravity than the original post. The fermenting beer goes absolutely crazy, with foam crawling up the FV and trying to escape through the airlock. This didn't cause me any issues, as I keep mine in a builders bucket partially filled with water, and an aquarium heater, but it's worth looking out for if you don't do this.

After 2 weeks, into the King Keg it went with 80g of priming sugar in solution, and after a further 2 weeks it was drinkable.

Lovely dark stout, with a thick head that lasts to the end of the pint. Chocolate and coffee notes, and a lovely smooth taste. Considering how simple to make this was, and how quickly it becomes drinkable, one the colder weather returns, I will be doing this kit / method again, and again...

Saturday 11 June 2011

Coopers Sparkling Ale

Type: Kit Brew
Sugars: 1.5 Kg Liquid Light Malt Extract, 500g Light Dry Malt Extract, 300g Brewing Sugar (Dextrose)
Yeast: Kit Yeast
Additions:Water de-chlorinated with 1/2 Campden tablet.
Time in Primary: 2 weeks
Secondary method: Bottle
Time in Secondary: 6 weeks plus
O.G. 1064
F.G. 1014

 There is a deli in my local town, Louth, that sells a fairly good range of both imported and domestic beers. Having brewed a number of Coopers kits, I was interested to see they had Coopers Sparkling Ale in 330ml bottles, all be it at an eye watering price. Fair enough, this stuff has come all the way around the world.

Coopers Sparkling Ale is a bottle conditioned ale, so there is a layer of yeast in the bottom of the bottle. just as with home brewed, bottled beer. Apparently, aussie drinkers are split between those who pour the beer carefully to avoid disturbing the sediment, and those who gently 'roll' the bottle to incorporate it into the brew. I settled on the former, and found it to be a nice, crisp, malty brew that I really enjoyed.

A couple of weeks later, and I walk into my home brew shop, and what have they just got in? Some of the 'Thomas Coopers Selection' kits for the first time. Marketed by Coopers as being for those who want to put a bit more effort, in terms of ingredients, into their brewing, I had to have a bash. I couldn't believe my eyes when I looked at their recommended list of fermentables ~ 1.5Kg of liquid malt, 500g of dry malt and 300g of dextose, but in for a penny...

It was a while before I got this kit on the go, as it really needs to be left down to condition for at least a month, so it had to go into bottles, which I needed to acquire. One of my friendly local boozers obliged, and I set about making it up. Apart from the fancy ingredients list, the brewing process is identical to other Coopers kits. The supplied yeast looks like yeast based hundreds and thousands as it is made up of both an ale and a lager yeast, which have slightly different colours. Brewed at a steady 21 degrees C, it was left under the air lock for the normal 2 weeks, then bottled. By then, it had reached a steady 1014, slightly higher than you would get if you just used brew enhancer, for instance, as there are more non-fermentable sugar components in malt extract.

The result? Amazingly close to the original, and a really nice brew. More expensive per pint, obviously, but a worthwhile enterprise all the same. Yet another blinder from Coopers.

Sunday 22 May 2011

Brewferm Triple

Type: Kit Brew
Sugars: About 600g of Golden Syrup
Yeast: Kit Yeast
Additions:Water de-chlorinated with 1/2 Campden tablet.
Time in Primary: 2 weeks
Secondary method: Bottle
Time in Secondary: 6 weeks plus
O.G. 1064
F.G. 1010


An interesting range of kits, these, mostly comprising of Belgian beers, but with the odd pilsner thrown in. Most of them make up smaller batches than your standard kit, despite the kits themselves being in the usual size cans. The instructions are also more complicated than standard, suggesting the use of Belgian Candi Sugar, and insisting on batch priming (explained below). OK, I know many people will batch prime their brew if bottling as a matter of course, but it's interesting that Brewferm suggest this as a required step (and no bad thing, that).

I couldn't get Candi Sugar easily, and making up the required amount manually (i.e. inverting normal sugar myself) appeared a bit of a faff, so I used golden syrup, which is a partially inverted sugar. Searching online gave me the required quantities (you need to use 20% more Candi sugar than if using simple sugars, and then have to take account of the liquid in the syrup, so 600g appeared about right). I also used a smaller 15L fermentation bid, as I thought the 9L that this kit makes up would look a little lost in a 5 gallon bin!

Have a look at the original and final gravities, and you will notice this is one string brew. Online opinion suggested a good 3 month maturation would be required in the bottle, but mine was smashing after 6 - 8 weeks. But, boy, is this stuff strong. It has a slightly syrupy, spicy taste, but isn't sickly. It also has the effect of preventing your legs from working if you drink too much.

Really impressive stuff, this. One of the best brews I have ever done, and will be trying others in their range. Next time, however, I am going to to set this down in smaller bottles, as a pint of this stuff is just a bit too much.

Coopers European Lager

Type: Kit Brew
Sugars: 1kg Brewing Sugar (Dextrose)
Yeast: Kit Yeast
Additions:Water de-chlorinated with 1/2 Campden tablet.
Time in Primary: 3 weeks @ 15 degrees C
Secondary method: Bottle
Time in Secondary: 3 months
O.G. 1040
F.G. 1006


I've done this kit twice. The first time, it was the first kit I did after returning to home brewing after many years. I didn't do my research on this one, didn't brew it at the correct temperature, didn't leave it long enough in the King Keg, forgot to prime the King Keg, didn't De-Chlorinate the water, and generally ended up with a rather poor brew.

However, after getting a number of sucsessful kits under my belt, I thought I'd try this one again. Unlike many 'lager' kits on the market, this one ships with a proper, bottom fermenting, lager yeast. This means that it really needs to be brewed at a much lower temperature than those that ship with an ale yeast. I managed to find a spot in the house that was a nice steady 15 degrees whatever the time of day, and left it to ferment there for three weeks under an air lock. I also learned, from my online research, that using spray malt instead of simple sugars can throw the balance of this kit off a bit, so I stuck with 1Kg of brewing sugar.

As warned in the instructions, the yeast gave off a rather 'bad egg' smell at various times during fermentation, and that was still detectable at bottling time. Although I was determined to leave this for the advised (online) 3 months, I opened a bottle from time to time to check progress. After 2 - 3 weeks, it still had a rather sulphuric king of twang and wasn't nice at all. Over the coming weeks, this dissipated and gradually it started to taste like a proper lager.

After about 3 months the result was totally transformed. A lovely, crisp, Beck's like lager that has great carbonation. Not an especially complex beer, but nice and refreshing all the same.

If you like Becks, give this one a go. Just be prepared to bottle it, and wait. Oh, and don't forget the lower fermentation temps!

Saturday 16 April 2011

Burton Bridge Summer Ale

Type: Kit Brew
Sugars: 1kg Muntons Brew Enhancer (500g Light Dry Malt, 500g Dextrose)
Yeast: Kit Yeast
Additions:Water de-chlorinated with 1/2 Campden tablet.
Time in Primary: 2 weeks
Secondary method: King Keg
Time in Secondary: 21 days
O.G. 1044
F.G. 1010

I had some reservations about buying this, as the nice lady in my favourite home brew centre explained that it was manufactured on behalf of Burton Bridge Brewery by Muntons. After my last experience, I wasn't overly confident. However, my Dad brews one of their bitter kits on a regular basis so I thought I'd give it a go.

Fermentation went without a hitch, leaving it in the FV for my usual 2 weeks. Very slightly darker than the ale pictures, but no much, it was looking hopeful. I had a little taste after2 weeks, but it wasn't ready so I spent another week drinking brought beer, as I had run out of home brew that was ready ~ more on that later.


After three weeks, it is a quite nice pint. Still a little green, or young, but quite drinkable. It has developed a slightly darker shade, but it is still a pale ale, and is quite light and refreshing. Not overly hoppy, either, but with a nice bitter edge. Would I recommend this kit? Yes, I think so, although I'd be tempted to bottle it and give it at least a month before drinking, as I appears to improve with age.

Next up ~ Coopers Original Series Stout 'a la Ditch'.

Sunday 3 April 2011

Temperature control on a budget

Having recently moved house, and no longer having access to a room that was kept at a fairly steady temperature by an oil burning range, I took temperature readings of various parts of the house, both when the central heating was on, and when it wasn't. The difference was sufficient to have me worry that I wouldn't be able to find anywhere with a steady 20 degree Celsius temperature that I find ideal foe most brews, those with real lager yeast excepted.

As is often the case, an excellent solution to this was provided by reading various online forums ~ fish tank immersion heaters, such as this;


Rated at 25 watts, it isn't going to chomp it way through too much electricity, and by placing the fermentation vessel in a builders bucket, filling with water so that is covers the part that has wort / beer in it, you can then drop the immersion heater in this and not have to worry about sterilising it, or unplugging it when you remove the FV for hydrometer readings, etc.


Total cost? I got 3 of the heaters for about £25, and the buckets are about a fiver each. So now I can have three brew on the go, all at a steady temperature. The brew pictured is a Coopers Original Series Stout, attempting to climb its way out of the FV! More on that anon...

Saturday 19 March 2011

Beer Review #2 : Samuel Smiths 'Old Brewery Pale Ale'


Brewer: Samuel Smiths
Brew: Old Brewery Pale Ale
A.B.V. : 5.1%
Format: Bottle
Score: 8.5 / 10
Review: Yum, yum yum yum, yum yum. Yum.

Oh, I actually have to review this as well? Ok then...

If your palette is all Sierra Nevada when it comes to pale ales, you will be uninspired by this brew, as it is a traditional English Pale Ale. The first thing you will notice is that its copper colour is much darker than many 'modern' pales ~ but then this is a traditional beer. It isn't as highly hopped as modern pales, either. But, by God, it's tasty. Despite it's darker colour compared to the new comers, it is still a light in body ale with a nice bitterness. I could happily sink several of these among friends in a session without feeling bloated. No strong malty taste detected by me, but then I think I have a fairly insensitive palette to malt (which I do enjoy in other beers). Like many English traditionals, and the hops provide more bitter than aroma. But, as I have said, yummy yum yum yum. It works.

Thursday 17 March 2011

Beer review #1 : Morland "Hen's Tooth"

I'm intending to review any beer that I drink that is worth reviewing, for two reasons. The first is that it might help anyone who reads this blog to get an idea of what I like and don't like, and compare it with their own preferences. For instance, if I describe a beer as 'so full of hops that my head fell off', and you felt it could have done with a couple more tonnes of cascade in there, then you can adjust my opinions of my own brewing efforts accordingly. The other reason is that it fills my blog out a bit and gives me something to prattle on about. Hope someone finds them useful.


Brewer: Morland
Brew: Hen's Tooth
A.B.V. : 6.5%
Format: Bottle
Score: 5 / 10
Review: A darker 'copper coloured' bottle conditioned ale, that pours to a 1-2 cm head of fine bubbles rather than foam. Hoppy aroma, that has a light body, similar to an American Pale Ale. The hops add an American Pale Ale type bitterness, but no fruity flavours. The head disappears quite quickly leaving only a thin layer of bubbles as the pint is drank. I found this beer a bit odd, it's dark enough to fool you into thinking it might have a bit of body or obvious malty taste, but it is actually quite crisp. Not an unpleasant beer, but I can't help feel it is neither one thing or the other, and doesn't succeed as being an interesting new style. If your Gran has just given you 20 bottles of this for Christmas, don't despair, it is quite drinkable, but I wouldn't intentionally seek it out, which is a shame, because I kind of like the idea of bottle conditioned ales, and no, not just because I want to re-culture the yeast in them!

Saturday 12 March 2011

Muntons Connoisseurs Continental Lager

Type: Kit Brew
Sugars: 1kg Muntons Brew Enhancer (500g Light Dry Malt, 500g Dextrose)
Yeast: Kit Yeast
Additions:Water de-chlorinated with 1/2 Campden tablet.
Time in Primary: 2 weeks
Secondary method: King Keg
Time in Secondary: 14 days
O.G. 1038
F.G. 1005

I should start this review with an admission. I almost 'took against' this kit from the moment I opened it. The extract looked way to dark, and this didn't improve once the kit was made up. Made up using my standard process ~ de-chlorinate the water, obsessive sterilisation, etc, I used 1Kg of Muntons own beer enhancer to give it a fighting chance. Original gravity came out at a slightly disappointing 1038, and primary fermentation was fairly slow, to be honest, not dropping to a steady 1005 for 11 days. And did I mention it was way to dark?

Transferred into a King Keg for conditioning, along with 85g of priming sugar, it took the standard (for me) 2 weeks to clear. The result?

Well, before I get to that, allow me to point out a couple of things. I know that most beer kits that claim to be lagers don't use proper lager yeast. This is no doubt a fairly good idea, as lager yeast needs to be fermented at a lower temperature than ale yeast, for longer, then 'largered' for an age. Coopers produce some excellent 'lager like' kits using ale yeast (see here), and they also produce a couple that use proper lager yeast, and the increase in both time spent  brewing and conditioning, and getting paranoid about weather the temperature is getting too high are huge. So, Muntons, I get it ~ it's a good idea to try to create a lager like beer using normal ale yeast, so that most people can knock something decent out without getting put off by added complications, ok?

Now let us look at the sales blurb;

  This is a light amber hoppy lager modelled on the full-bodied beer available across mainland Europe. Serve chilled to appreciate its rich character.

But how on earth you get away with calling this a 'lager' is beyond me. Take a look the the following snap. On the left, we have the arse end of my barrel of Coopers Canadian Blonde, another 'lager that isn't a lager', and a jolly nice one too. One the right we have the Muntons;


Can anyone tell me what is wrong with this picture? No? then compare it with the beautifully presented pint on the kit can above...

Lager, apart from Dunkels, are blonde / light / pale beers. This? Well, it's not quite as dark as some bitters, but it's colour reminds me of a Samuel Smiths Original factory Pale Ale ~ i.e. not that pale. It isn't unpleasant, but it is way too dark and has an overly ale like taste to it. This doesn't bother me too much, but if someone had brought this kit because they didn't like bitter, I can't help feeling that the result would be a very disappointed home brewer. If this was a first attempt at brewing, I worry that the same person would give in, thinking that home brew was all 'crap'.

There is no good reason for such a monumental style failure ~ least of all by the company that manufacture nearly all the kits on the UK market, Coopers and Brewferm excepted. What really annoys is that those two companies are not British ~ Australian and Belgian respectively. Are we really so knackered as a country that even though we grow brewing grade grain en masse, grow and develop hops, and have a thriving micro brewing industy, that one of the biggest malt producers in the world think they can fob people off with this shoddiness? It isn't the 1970's, you know, Muntons.

In case you hadn't gathered ~ not a kit I would recommend.

Monday 21 February 2011

Coming up...

Blogging about brewing is, as I have found fairly rapidly, a bit tricky.

I've ran or contributed to a number of blogs over the last few years on many of my interests ~ shooting, politics, cooking*, etc, and have generally found that to make a blog reasonably successful you need to post regularly, ideally every day.

As I am only blogging about a brew after it is ready for drinking, and am only brewing every two weeks or so (more sometimes when I'm on annual leave from work, that sort of thing), that kind of limits my blogging material.

I'm thinking ways around this, but just so that you know I'm on the case, I will have the following appearing here soon;

  • Coopers European Lager ~ kit with proper lager yeast, thus takes much longer and much more sensitive to temperatures. Brewed and bottled, but won't be ready for drinking (and thus blogging about) for another 12 weeks!
  • Muntons Connoisseur Lager ~ not a lager yeast, racking into a Keg sometime this week, ready a couple of weeks after that, blog post then.
  • Brewferm Triple ~ interesting kit, a couple of weeks in the fermenter plus 8 to 10 bottle conditioning, starting tomorrow, but will blog twice on this, the brew and the drinking, so brew post very soon, drinking post in about 10 weeks.
  • Coopers Sparkling Ale ~ another interesting kit which I will be making more interesting (as kit brews go) by using re-activated yeast from proper Coopers Ale. Again, initial post within a week, drinking post several weeks later.
  • My attempt at a Dunkel ~ brew post soon(ish) and drinking post later.
  • An American IPA extract brew (brew post in a couple of weeks, drinking post sometime later).
I've also got a couple of ideas for  general informational posts to write, so keep checking back.

* these are separate blogs. Much as I hate politicians, even I haven't written one about shooting politicians and eating them. lol.

Sunday 20 February 2011

Coopers Canadian Blonde

Type: Kit Brew
Sugars: 1kg Muntons Brew Enhancer (500g Light Dry Malt, 500g Dextrose)
Yeast: Kit Yeast
Additions:Water dechlorinated with 1/2 Campden tablet.
Time in Primary: 2 weeks
Secondary method: King Keg
Time in Secondary: 18 days
O.G. 1044
F.G. 1004

Ok, I mean, come on.... You walk into a Home Brew Shop and get offered a Canadian Blonde to take home for a few quid. You would have to be a friend of Graham Norton not to jump at the chance, eh?

Seriously, this kit came highly recommended on my favourite beer forum so I thought I'd give it a go, and also give it a fighting chance by using a 50% Malt, 50% brewing sugar 'brew enhancer' instead of your standard 1kg of Silver Spoons finest. Not a proper 'lager', this kit uses ale yeast, which isn't unusual for kit brews given the temperature complications of producing proper lager as opposed to mass produced shit such as that which may be found in some pubs (he said, looking over his shoulder at his libel lawyers) *, so I was hoping this might be a bit pale ale~ish.

Fermentation was pretty active to begin with ~ if you are thinking of doing this brew as described make sure you have a decent amount of head space in your fermenter. It dies down fairly quickly, and I left it for my standard 2 weeks ~ I brew in sealed FV's with airlocks, so I don't worry too much about leaving it longer than may be necessary, and prefer to give the dead yeast time to drop.

Racked into a King Keg with 85g of normal sugar to prime, flood CO2 pressurised and left for 18 days, the results are pretty good. My calculations have this at 5.3%, slightly higher than Coopers designed, but my brew length was 20L instead of 23L.

Result? Slightly more hops than Coopers Australian Pale Ale, less sweet, and more malty, although take into account the ingredients used. It's head retention is pretty good, and gives you a nicely carbonated pint right to the end of the glass.

Another great beer from Coopers World Series, well recommended. It will be interesting to compare this with the Muntons Connoisseur Lager I have fermenting at the moment (just in case you were thinking this was a Coopers love in blog!)

 * Just to explain this ~ proper lager is brewed at a much lower temperature than Ale, and for longer. Conditioning is also at a much lower temp, in fact that is where the term lager comes from and....... ok, this needs it's own blog post!)

Sunday 13 February 2011

Turbo Cider

Being able to make drinkable cider from supermarket 'value' apple juice appeals to my tight northern nature, so when I read about Turbo Cider, I thought I'd give it a go.

The recipe is simplicity itself, and it therefore doesn't take long to knock up a batch, hence the name. After reading many articles and forum posts on the subject, I came up with a generic recipe and method as follows;

4l Supermarket Apple Juice (from concentrate is fine, get the clear stuff with no 'bits')
About 85g of normal white sugar
Juice of half a lemon
Cup of really, really strong tea (without milk!)
Half a teaspoon of glycerol
Suitable Yeast

The method is simplicity itself. Sanitise a gallon demijohn.  Make a cup of strong, undrinkable, black tea (5 teabags in a cup of boiling water for 15mins). This gives the brew the tannins required. Dissolve the sugar in about a cup of boiling water. Add all the ingredients into the demijohn (boiling sugar solution last) and pitch the yeast.

Pop the airlock on and leave it somewhere warmish, i.e. 20 degrees or so.

After about a week or so, the cider will start to clear. Check it's FG with a hydrometer, and if it is below 1010, bottle it with a teaspoon of sugar per 500ml bottle. Leave it in the same warm place for 7 days or so, to allow for secondary fermentation, then place it somewhere cool. Mine dropped completely clear within a week, but I left the bottles for 2 weeks before sampling it. I made one batch with Young's cider yeast, and one with Young's champagne yeast. At the bottling stage, the cider yeast batch smelt and tasted OK, whereas the champagne yeast batch didn't appear very promising at all. However, after 3 weeks or so in the bottle, the position has revered, and the cider yeast stuff is nice, whereas the champagne yeast stuff is even better.

Be warned, however, folks ~ this stuff is potent. I've calculated that mine has come out knocking on the door of 8%!

Wednesday 9 February 2011

Coopers Australian Pale Ale

Type: Kit Brew
Sugars: 1kg Cane Sugar
Yeast: Kit Yeast
Additions:Water dechlorinated with 1/2 Campden tablet.
Time in Primary: 2 weeks
Secondary method: King Keg
Time in Secondary: 2 weeks
O.G. 1040
F.G. 1002!

One of Coopers 'World Series' kits, at least here in the UK, I brought this kit as I wanted to test the effect that de-chlorinating water with a Campden tablet had, so wanted to brew a kit that I thought would be bland and flavourless to see if I could pick up the difference.

I could indeed, but this kit isn't as bland as I expected.

It is definitely an ale, rather than a lager kit shipped with ale yeast, but it is light and not at all hoppy. OK, I brewed it with normal sugars, but it is very quaffable, without being overly boring like many a commercial lager. My OG / FG calculations suggest a 5% a.b.v. which I am not totally sure is correct, so perhaps I misread the OG. The FG was almost certainly 1002, as I was worried that there would be little yeast left for secondary fermentation.

As is transpired, 85g of cane sugar in the King Keg, followed by the standard C02 purge has resulted in a very, almost over, carbonated beer after a couple of weeks, without any further C02 top-up. To be honest, better this way than flatter than a witches tit, and it isn't that hard to pour a decent pint, it just requires a little patience.

Overall, I'm very pleased with the outcome of this. A lovely weekday beer that you can drink a couple of pints of without staggering around the place, and as I have found with all Coopers kits, the actual brewing process is bomb proof. My 'to brew' list is pretty long at the moment, but I can well imagine returning to this kit, either on its own, or as a basis of experimentation with additional malts, hops, etc.


Coming up next : Coopers Canadian Blonde