
Tuesday, 19 February 2019
Hewitt's Brothers, Grimsby
I am always interested in the brewing history of the region in which I live. The largest brewery around here must have been Hewitt Brothers in Grimsby, who at their peak supplied over 300 pubs. I'd love to get my hands on some of their brewing records and have a go at recreating one of their beers. I wonder if they used the Yorkshire square method? Wyatt was their yeast like? In the meantime, here is a photo of the brewery in it's prime.


Saturday, 2 February 2019
1928 Barclay Perkins IPA
There is something about this recipe that jumped out at me from Shut up about Barklay Perkins. It sort of shouted 'this is what IPA'a used to be' before they became overly strong flower bombs. I can't find American 6-row malt anywhere in the UK, but read somewhere on a substitution chart to try UK lager malt. I had hook head pale and lager in stock so they were used. Finally, I don't have actual #3 brewers invert to hand, so made a substitute using the unrefined cane sugar and the dilution method here. One of the yeasts Kristen English suggests is Notty, so I used Mangrove Jacks New World Strong, which is really their Northern English Brown, and is meant to have similar characteristics to Notty.
So the final recipe was;
HOME BREW RECIPE:
Title: 1928 Barclay Perkins IPA
Brew Method: All Grain
Style Name: English IPA
Boil Time: 120 min
Batch Size: 20 liters (fermentor volume)
Boil Size: 29 liters
Boil Gravity: 1.034
Efficiency: 70% (brew house)
STATS:
Original Gravity: 1.050
Final Gravity: 1.012
ABV (standard): 4.94%
IBU (tinseth): 40.46
SRM (morey): 10.37
FERMENTABLES:
2.43 kg - Hook Head Pale Malt(57.3%)
0.75 kg - Irish Lager (17.7%)
0.56 kg - Flaked Corn (13.2%)
0.5 kg - #3 Brewers invert sub (11.8%)
HOPS:
8 g - Challenger, Type: Pellet, AA: 8.5, Use: Boil for 120 min, IBU: 10.83
32 g - Fuggles, Type: Pellet, AA: 4.5, Use: Boil for 60 min, IBU: 21.04
17 g - Fuggles, Type: Pellet, AA: 4.5, Use: Boil for 30 min, IBU: 8.59
8 g - East Kent Goldings, Type: Pellet, AA: 5, Use: Dry Hop for 0 days
MASH GUIDELINES:
1) Infusion, Temp: 67 C, Time: 90 min, Amount: 11.2 L
2) Sparge, Temp: 72 C, Time: 15 min, Amount: 23.5 L
Starting Mash Thickness: 3 L/kg
YEAST:
Mangrove Jack - New World Strong Ale M42
 My weighing scales packed up, I suspect a flat battery, just as I was going to weigh the last hop additions, both fuggles. Luckily, I had an unopened 100g bag of them. So I split it in half visially to get 50g, the visually split this into thirds as the two additions add up to 50g in a one third / two third ratio, give or take.
I dod the whole mash / boil outside to minimise the smell in the house (I usually mach in the conservatory), so I'm not sure how that affected the temperature retention in my mash tun, I really must get a digital thermometer with a probe so I can record this sort of stuff. Finally, I treated the water using Grahams Wheelers calculator to give a 'Dry Pale Ale' profile.
All went well, all be it a very long day with the long boil and mash times. I hit exactly 1050, and my pre-boil gravity was within a point as well. There was tons of cold break / trub / gunk in the boiler, however, which I didn't want to carry through into the FV, so I only realised 18.5 / 19L into the FV rather than 20, but I'm not that fussed. The immersion chiller got the wort down to 16.5° before I knew it, so the yeast was pitched at that temp and the fermenting fridge set to 18°. 18 hours later, there was some signs of life, but by 24 hours it was in full swing. Really looking forward to this one!
So the final recipe was;
HOME BREW RECIPE:
Title: 1928 Barclay Perkins IPA
Brew Method: All Grain
Style Name: English IPA
Boil Time: 120 min
Batch Size: 20 liters (fermentor volume)
Boil Size: 29 liters
Boil Gravity: 1.034
Efficiency: 70% (brew house)
STATS:
Original Gravity: 1.050
Final Gravity: 1.012
ABV (standard): 4.94%
IBU (tinseth): 40.46
SRM (morey): 10.37
FERMENTABLES:
2.43 kg - Hook Head Pale Malt(57.3%)
0.75 kg - Irish Lager (17.7%)
0.56 kg - Flaked Corn (13.2%)
0.5 kg - #3 Brewers invert sub (11.8%)
HOPS:
8 g - Challenger, Type: Pellet, AA: 8.5, Use: Boil for 120 min, IBU: 10.83
32 g - Fuggles, Type: Pellet, AA: 4.5, Use: Boil for 60 min, IBU: 21.04
17 g - Fuggles, Type: Pellet, AA: 4.5, Use: Boil for 30 min, IBU: 8.59
8 g - East Kent Goldings, Type: Pellet, AA: 5, Use: Dry Hop for 0 days
MASH GUIDELINES:
1) Infusion, Temp: 67 C, Time: 90 min, Amount: 11.2 L
2) Sparge, Temp: 72 C, Time: 15 min, Amount: 23.5 L
Starting Mash Thickness: 3 L/kg
YEAST:
Mangrove Jack - New World Strong Ale M42

I dod the whole mash / boil outside to minimise the smell in the house (I usually mach in the conservatory), so I'm not sure how that affected the temperature retention in my mash tun, I really must get a digital thermometer with a probe so I can record this sort of stuff. Finally, I treated the water using Grahams Wheelers calculator to give a 'Dry Pale Ale' profile.
All went well, all be it a very long day with the long boil and mash times. I hit exactly 1050, and my pre-boil gravity was within a point as well. There was tons of cold break / trub / gunk in the boiler, however, which I didn't want to carry through into the FV, so I only realised 18.5 / 19L into the FV rather than 20, but I'm not that fussed. The immersion chiller got the wort down to 16.5° before I knew it, so the yeast was pitched at that temp and the fermenting fridge set to 18°. 18 hours later, there was some signs of life, but by 24 hours it was in full swing. Really looking forward to this one!
Thursday, 31 January 2019
Brews update
1939 Barklay Perkins Sparkling Beer
After 5 days of airlock activity at 14°, it slowed and stopped, suggesting the primary phase of fermentation was well over and it was nearing the end and it was diactyl rest time. So the fermenting fridge was set to 18° and left. The airlock started to show activity when I checked again, by which time it has reached 16.5° but had stopped a day later, so I'm hoping this was dissolved CO2 escaping not fermentation starting again as it had stalled.
WOW Wines
Both appeared to have finished fermenting and are slowly clearing. I need to get some finings as mine are out of date, then I'll rack them for clearing.
After 5 days of airlock activity at 14°, it slowed and stopped, suggesting the primary phase of fermentation was well over and it was nearing the end and it was diactyl rest time. So the fermenting fridge was set to 18° and left. The airlock started to show activity when I checked again, by which time it has reached 16.5° but had stopped a day later, so I'm hoping this was dissolved CO2 escaping not fermentation starting again as it had stalled.
WOW Wines
Both appeared to have finished fermenting and are slowly clearing. I need to get some finings as mine are out of date, then I'll rack them for clearing.
Friday, 25 January 2019
1939 Barklay Perkins Sparkling Beer
Today's brew was 1939 Barklay Perkins Sparkling Beer, from Ron's blog, but in my case I took it from Let's Brew!, which is a fantastic book in my opinion.
Firstly, I plugged the recipe into Brewers Friend. I found that to get the correct colour as specified by Ron, I would need to use my dark crystal malt, then it was bang on. The hop additions were Saaz / Saaz / Saaz at 90, 60 and 30 mins. I'm afraid I didn't have enough in stock so for the 90 min addition I substituted challenger in a quantity to give the same bitterness. I'm hoping that after 90 mins, it will only be bitterness that this addition contributes. I aimed for 21L in the FV. This gave;
FERMENTABLES:
4.1 kg - United Kingdom - Lager (89.1%)
0.5 kg - United Kingdom - Dark Crystal 80L (10.9%)
HOPS:
15 g - Challenger, Type: Pellet, AA: 8.5, Use: Boil for 90 min, IBU: 18.89
25 g - Saaz, Type: Pellet, AA: 3.5, Use: Boil for 60 min, IBU: 12.12
25 g - Saaz, Type: Pellet, AA: 3.5, Use: Boil for 30 min, IBU: 9.31
The major departure from the original is that I don't have a lagering plant, unlike Barklay Perkins, so I decided to use the faux lager method, with Crossmyloof's California Common yeast, double pitched and fermented at 14°.
This was my first go at water treatment, so CRS was used to reduce alkalinity, and gypsum added, to give the 'bitter' water profile in Grahams Wheeler's calculator. That seemed about right for the malt bill.
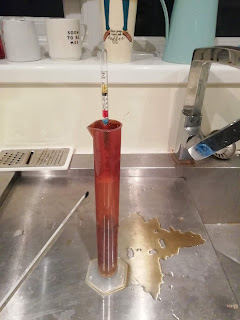 All went well, but I ended up with 20.5L instead of 21, and the OG was 1049, which is slightly over. The wort was really clear ~ much clearer than I usually end up with, and if anything, I returned less of the first runnings back into the mash tun than usual. All I can think is that this is the first time I have used base malt from The Home Brew Company ~ hook head Irish lager malt. I wonder if their crush settings suit the bazooka filter on my mash tun better?
I am now drinking homebrew waiting for my brew fridge to cool the wort the last couple of degrees to pitching temp (20° ). The fridge will then be left on to rapidy get it down to the fermenting temp of 14° .
Firstly, I plugged the recipe into Brewers Friend. I found that to get the correct colour as specified by Ron, I would need to use my dark crystal malt, then it was bang on. The hop additions were Saaz / Saaz / Saaz at 90, 60 and 30 mins. I'm afraid I didn't have enough in stock so for the 90 min addition I substituted challenger in a quantity to give the same bitterness. I'm hoping that after 90 mins, it will only be bitterness that this addition contributes. I aimed for 21L in the FV. This gave;
FERMENTABLES:
4.1 kg - United Kingdom - Lager (89.1%)
0.5 kg - United Kingdom - Dark Crystal 80L (10.9%)
HOPS:
15 g - Challenger, Type: Pellet, AA: 8.5, Use: Boil for 90 min, IBU: 18.89
25 g - Saaz, Type: Pellet, AA: 3.5, Use: Boil for 60 min, IBU: 12.12
25 g - Saaz, Type: Pellet, AA: 3.5, Use: Boil for 30 min, IBU: 9.31
The major departure from the original is that I don't have a lagering plant, unlike Barklay Perkins, so I decided to use the faux lager method, with Crossmyloof's California Common yeast, double pitched and fermented at 14°.
This was my first go at water treatment, so CRS was used to reduce alkalinity, and gypsum added, to give the 'bitter' water profile in Grahams Wheeler's calculator. That seemed about right for the malt bill.
 All went well, but I ended up with 20.5L instead of 21, and the OG was 1049, which is slightly over. The wort was really clear ~ much clearer than I usually end up with, and if anything, I returned less of the first runnings back into the mash tun than usual. All I can think is that this is the first time I have used base malt from The Home Brew Company ~ hook head Irish lager malt. I wonder if their crush settings suit the bazooka filter on my mash tun better?
I am now drinking homebrew waiting for my brew fridge to cool the wort the last couple of degrees to pitching temp (20° ). The fridge will then be left on to rapidy get it down to the fermenting temp of 14° .
Tuesday, 15 January 2019
Apple, grape & raspberry WOW #2
Another batch of this one.

700g of sugar instead of the intended 600g, last minute decision, to see if it thins it out a bit, as the last one took a long time to condition and the boss thought it was a bit 'syrupy' - although adding more sugar might seem daft, I'm hoping it ferments out and leaves it a little drier. The pineapple and apple WOW is still going crazy. The lava lamp like rise and fall of fruit sediment particles caused by the CO2 bubbling is quite hypnotic. Usually, my beer ferments in FV's that aren't transparent, so it's interesting to see quite how turbulent it gets in there when the yeast is in full swing.
I might get a chance to do a brew tomorrow...
Monday, 14 January 2019
Pineapple and apple WOW
I haven't had any time to brew beer, but I managed to throw a WOW together. Unlike all the previous fruit juice wines I've done, this one doesn't contain any grape juice. This could be a winner of it turns out ok, as we usually do our food shopping in Aldi who don't stock grape juice. The recipe was;
1 X 500ml of Pineapple Juice
2 X 500ml of Apple Juice
600g of sugar
1 TSP each of nutrient, yeast, pectolase, citric acid and tannin plus 1/2 TSP glycerol.
2 X 500ml of Apple Juice
600g of sugar
1 TSP each of nutrient, yeast, pectolase, citric acid and tannin plus 1/2 TSP glycerol.
The yeast was Young's Super Wine Yeast Compound.
It took off fairly quickly, and is now bubbling away happily.
Day 1

Day 3

Monday, 7 January 2019
Crown cap bottle labels
For me, labelling up my brews is something I always think about doing, and have designed labels on websites such as beer labalizer, but never get around to. This is mainly because of two reasons ~ the first is that they use a lot of paper, and thus ink, so can work out surprisingly expensive to print on an inkjet printer ~ at 4 labels per A4 sheet, your looking at 10 or so pages of full colour printing for a full brew length. The second reason is that after agonisingly removing the commercial labels from my bottles, it's quite nice not to have to do that again. Ever.
The solution came by way of this thread on the home brew forum.
The idea is to print circular labels that are the correct size to be stuck onto the crown cap of your bottles. You can get a full brew length's worth on a single sheet of A4, and you throw away the thing they are stuck to when you drink the beer, so the bottles remain label free. Additionally, what is in the bottle is easily identifiable from above, which is useful if they are in a crate or low shelf.
Here's how I did it;
 1. Design and print the labels
I use Ubuntu Linux on my laptop, so I had access to 'gLabels'. This allows me to design and print a sheet of 24mm round labels using the 'Endisch 6500024x' template for 24mm round labels . Obviously, on a 24mm round label, you are limited as to the amount of text you can fit in, but I have found that I can easily fit the batch number, beer type and bottling date on them. This is all I need when deciding what to drink, the rest is in my brewing notes and can be found using the batch number.
 2. Print out a sheet of labels and 'punch' them out
To do this, you need a 1'' or 25mm punch. These are available from hobbycraft, and various other places. I received this one as a Christmas present from the kids ~ it creates labels with a patterned edge (much like a crown caps!) but they are also available as normal circles. They aren't overly expensive ( a few quid) if you shop around. Its the orange thing in this photo. Lining up the punch with the circular labels is easier if you hold the punch upside down, and you can then see when the paper is aligned. It's easier to do than explain. You may also need to trim off the non printer top of the paper with scissors so that the punch can 'reach' the first line of labels, but once you have done this you can punch away.
 3. Glue them on.
I used craft PVA diluted in water ~ just a tiny amount of PVA in a fair amount of water to get a liquid with a consistency similar to milk. I then painted this liquid liberally onto the top of the battle cap, placed a label on, and pressed it down. That's it!
The idea is to print circular labels that are the correct size to be stuck onto the crown cap of your bottles. You can get a full brew length's worth on a single sheet of A4, and you throw away the thing they are stuck to when you drink the beer, so the bottles remain label free. Additionally, what is in the bottle is easily identifiable from above, which is useful if they are in a crate or low shelf.
Here's how I did it;

I use Ubuntu Linux on my laptop, so I had access to 'gLabels'. This allows me to design and print a sheet of 24mm round labels using the 'Endisch 6500024x' template for 24mm round labels . Obviously, on a 24mm round label, you are limited as to the amount of text you can fit in, but I have found that I can easily fit the batch number, beer type and bottling date on them. This is all I need when deciding what to drink, the rest is in my brewing notes and can be found using the batch number.

To do this, you need a 1'' or 25mm punch. These are available from hobbycraft, and various other places. I received this one as a Christmas present from the kids ~ it creates labels with a patterned edge (much like a crown caps!) but they are also available as normal circles. They aren't overly expensive ( a few quid) if you shop around. Its the orange thing in this photo. Lining up the punch with the circular labels is easier if you hold the punch upside down, and you can then see when the paper is aligned. It's easier to do than explain. You may also need to trim off the non printer top of the paper with scissors so that the punch can 'reach' the first line of labels, but once you have done this you can punch away.

I used craft PVA diluted in water ~ just a tiny amount of PVA in a fair amount of water to get a liquid with a consistency similar to milk. I then painted this liquid liberally onto the top of the battle cap, placed a label on, and pressed it down. That's it!
Subscribe to:
Posts (Atom)